
| Version 7 (modified by , 3 years ago) ( diff ) |
|---|
Running in VirtualBox
This page describes how to use VirtualBox to run various HelenOS images you either downloaded or built yourself.
Basics
Create the virtual machine
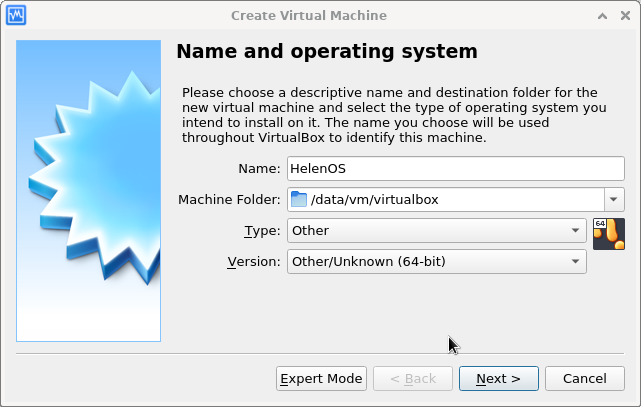
Use an ia32 or amd64 ISO image of HelenOS version 0.12.1 or later. Create a new virtual machine. Since VirtualBox does not provide a HelenOS template, use OS type Other and version Other/Unknown (64-bit). It will be necessary to further customize the virtual machine in order to get audio and networking. Click Next.

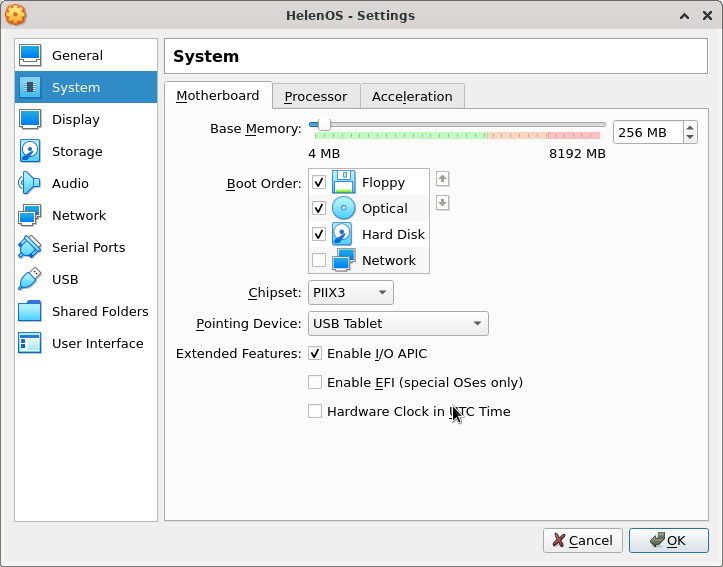
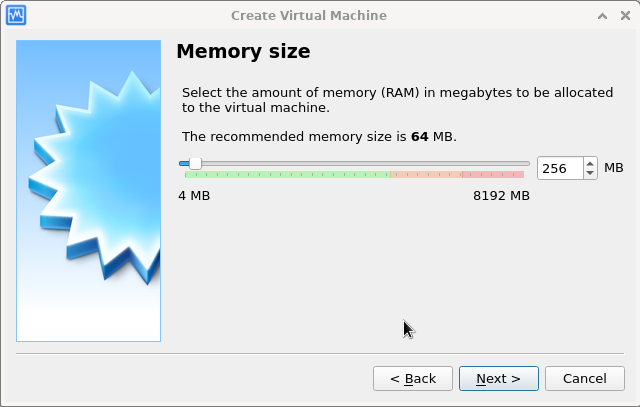
Set memory size to 256 MB.

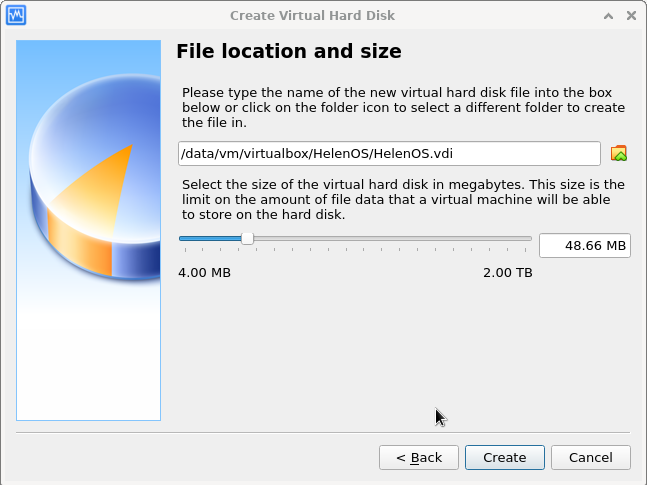
Add a virtual disk. It can be fairly small (e.g. 50 MB).

Note: Some Ubuntu provided versions of VirtualBox don't seem to work with HelenOS ISO images. Try running with vanilla VirtualBox instead.
Set up networking
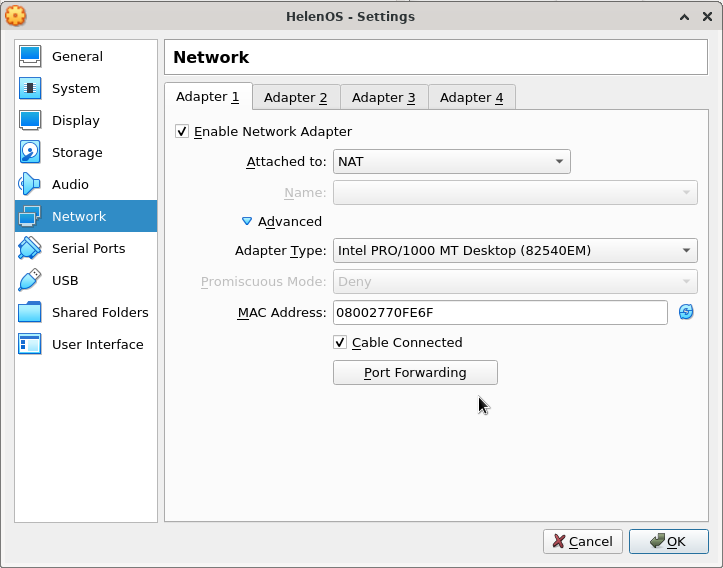
Open virtual machine Settings. Under the Network section / Adapter 1 open Advanced and change the Adapter Type. Select either Intel PRO/1000 MT Desktop or Intel PRO/1000 MT Server.

Configure audio
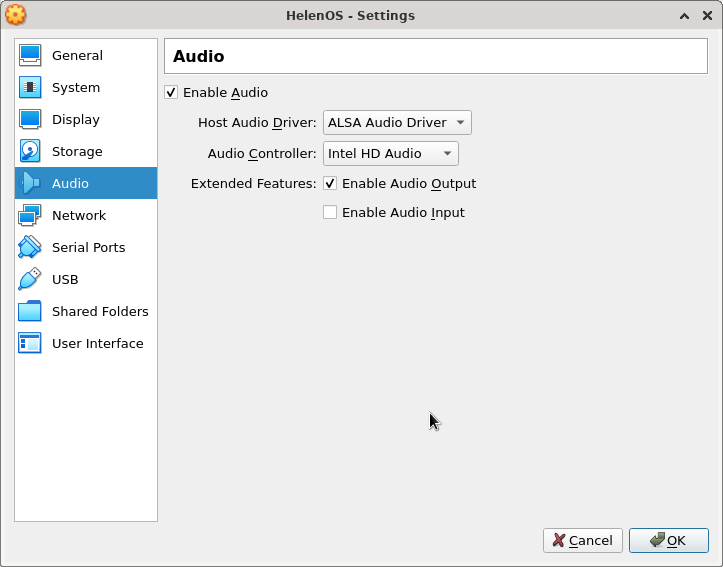
In virtual machine Settings, under Audio section change Audio Controller to Intel HD Audio (SoundBlaster 16 also works).

Enable mouse pointer integration
In virtual machine Settings, under System section, Motherboard tab, change Pointing Device from PS/2 mouse to USB Tablet.

Networking
In HelenOS releases older than 0.12.1 you will not get a working network connection in VirtualBox.
For general information about networking in HelenOS, please see UsersGuide/Networking.
See VirtualBox manual for more information on networking in VirtualBox.
In order to use networking in HelenOS running under VirtualBox, the guest needs to have at least one Network Adapter enabled in Network configuration menu. Note that VirtualBox supports several networking cards, but out of these, HelenOS has driver only for the Intel PRO/1000 variants.
Being based on the QEMU networking code, VirtualBox provides similar networking options as QEMU, namely in the NAT and Bridged mode. The difference is that VirtualBox provides easy to use configuration GUI and saves the user from fiddling with the host setup, so that especially the Bridged mode is much easier to use.
In the NAT mode, the respective guest network interface will be behind a NAT firewall provided by VirtualBox. The NAT mode is essentially the same as QEMU user networking with port forwarding, including the assigned addresses and limitations. To use the network adapter in the NAT mode, simply select NAT in the Attached to: menu. Note that NAT is the default mode.
In the Bridged mode, VirtualBox arranges for a setup, in which the HelenOS guest will be on the same network as the host itself. What is nice about this mode is that it works out of the box and no special setup is required. Just select Bridged Adapter in the Attached to: menu.
Audio
With HelenOS releases older than 0.12.1 you will need to use SoundBlaster 16 as the audio adapter. Intel HD Audio will now work correctly in these old releases.
For HelenOS 0.12.1 or later you can use either SoundBlaster 16 or Intel HD Audio.
USB
TODO write this section
Advanced Networking
In HelenOS releases older than 0.12.1 you will not get a working network connection in VirtualBox.
For general information about networking in HelenOS, please see UsersGuide/Networking.
See VirtualBox manual for more information on networking in VirtualBox.
In order to use networking in HelenOS running under VirtualBox, the guest needs to have at least one Network Adapter enabled in Network configuration menu. Note that VirtualBox supports several networking cards, but out of these, HelenOS has driver only for the Intel PRO/1000 variants.
Being based on the QEMU networking code, VirtualBox provides similar networking options as QEMU, namely in the NAT and Bridged mode. The difference is that VirtualBox provides easy to use configuration GUI and saves the user from fiddling with the host setup, so that especially the Bridged mode is much easier to use.
In the NAT mode, the respective guest network interface will be behind a NAT firewall provided by VirtualBox. The NAT mode is essentially the same as QEMU user networking with port forwarding, including the assigned addresses and limitations. To use the network adapter in the NAT mode, simply select NAT in the Attached to: menu. Note that NAT is the default mode.
Serial ports
TODO write this section
Attachments (6)
- createvm.png (71.7 KB ) - added by 3 years ago.
- tablet.png (62.1 KB ) - added by 3 years ago.
- audio.png (42.3 KB ) - added by 3 years ago.
- disk.png (70.3 KB ) - added by 3 years ago.
- memory.png (52.3 KB ) - added by 3 years ago.
- network.png (56.3 KB ) - added by 3 years ago.
Download all attachments as: .zip